Showing posts with label spelt. Show all posts

Monday, 27 January 2014

Slow cooking, stovetop cooking, thermomixing and Lamb ragu . . .

Slow-cooking to the non-Thermomix owner, probably looks like a convenient way to feed your family a nutritious meal. You just need to prepare your ingredients in the morning, throw them in the slow cooker and allow them to cook all day until you are ready to eat your meal at night . . but hold on, does this sound nutritious to you? To me it sounds more like a slow death to nutrients!

Although both a slow-cooker (and also a Thermomix), typically cook food at less than the boiling point of water, which is considered a healthier way of cooking . . . surely the prolonged heat exposure to vegetables in particular, as a result of hours and hours of slow-cooking, has to put the integrity of the more unstable water-soluble vitamins and phytonutrients at unnecessary risk? Of course, there are always exceptions, such as the antioxidant lycopene, a red pigment carotenoid, which actually becomes more bioavailable when tomatoes are cooked. But shouldn't we also be concerned about the other more fragile micronutrients in tomatoes? 

As a general rule, the longer a food is exposed to heat and the higher the cooking temperature, the higher the subsequent nutrient loss. Preserving nutrients as best you can using cooking methods is definitely a tricky science, especially on the stovetop where timing is crucial if you wish to preserve the nutrients in the foods you are cooking. 

Steaming has long been recommended as the most favourable method of stovetop cooking to reduce nutrient loss and thankfully we can look to our trusty Thermomix to help us out with this method of cooking in the Varoma. But rest assured, we can also look favourably at the TM bowl method of cooking in comparison to stovetop cooking methods such as simmering, boiling and frying which all expose foods to higher temperatures which are difficult to control. This is just another way that the Thermomix comes into it's own, not only are foods cooked quickly (less time) and at comparably low temperatures which are preset and controlled, they are cooked to perfection if you follow well-tested recipes, ensuring that nutrient loss is kept to a minimum.  In terms of nutrition, quick methods of cooking at low temperatures has to be more superior, and any Thermomix owner understands the concept of 'fast' in comparison to other methods of cooking. 
Traditionally a lamb ragu is slow cooked for hours to develop flavours and tenderize meats. Using a heavy based pan and my thermie, I believe that I have achieved that lovely richness of flavour and melt in the mouth texture to the lamb in much less time, preserving more of the nutrition in your lamb and vegetables :)


ingredients
lamb ragu
700g diced lamb
1 tsp ground coriander
1/2 tsp ground fennel
1/2 tsp ground cumin seeds
1 tbsp organic butter or ghee
2 large cloves garlic
1 onion, halved
1 large carrot, cut into chunks
20-40g extra virgin olive oil
50g tomato paste or concentrate
1 tbsp TM vegetable stock paste
400g can BPA-free tomatoes (or your own TM cooked tomatoes)
100g tomato passata or sauce
2 sprigs of fresh rosemary, leaves only
1 tbsp fresh thyme leaves and/or parsley
1 dry bay leaf
1/2 cup dry red wine

method

1. Make a spice rub for the lamb by combining the coriander, fennel and cumin in a small bowl with the diced lamb. Mix well to cover and place in the fridge for about 30 minutes. TIP: It does pay to freshly grind your spices from the whole variety so that your finished dish will be more fragrant and flavoursome. Also, your lamb should be evenly diced for successful shredding later. 

2. Melt the butter or ghee in a heavy based pan (cast iron and not non-stick preferably) over moderately-high heat. In two batches, sear the lamb on all sides until deeply browned, about 4-5 minutes per batch. Remove the meat to a plate and repeat with the remaining lamb. The lamb should still be rare inside. DO NOT clean the pan!

3. Now add the spiced lamb to the TM bowl and shred for 2-4 seconds on reverse speed 5 to break up slightly. The lamb will break up further as it simmers, so don't over-do this step and turn your lamb into mush. Remove to the plate. 

4. Add the garlic cloves, onion and carrot to TM bowl. Chop on speed 7 for 5 seconds. Add olive oil and sauté at Varoma temp for 3 minutes on speed 1Scrape down sides of bowl, add tomato paste and cook a further 2 mins at Varoma temp.

5. Add dry red wine to the frypan and deglaze, simmer on the stovetop until the liquid thickens. Then scrape contents of the frypan into the TM bowl.

6. Return the shredded lamb to the TM bowl and add the remaining ingredients (stock paste, canned tomatoes, passata, fresh herbs and bay leaf) to the TM bowl. 

7. Simmer the ragu at 90°C, speed soft, reverse for at least 15 minutes. . . or longer if you prefer in which case you may need to add some water. . . . just don't cook it all day :) 

Meanwhile cook your pasta or lightly steam or sauté your zucchini spirals. I like to serve with a side of green salad or steamed broccoli to ensure that we are getting our daily greens quota :)  


Monday, 1 April 2013

Spelt hot cross buns

First up, apologises for the late post as ideally you should have had this recipe in time for Good Friday . . . but life is never ideal is it? Easter is almost done and dusted for 2013, but you don't have to stop eating hot cross buns just yet do you? (in moderation of course, plus they freeze really well). I have been making my own hot cross buns at Easter for years, although originally I didn't use spelt flour and would use my bread machine to knead and prove the dough. I completely avoid the commercial varieties, not just because of all the additives and other synthetic ingredients, but because once you've had homemade you just can't go back can you? My crosses may not be as white and perfect as the store bought ones, but that's by choice . . . I choose the rustic look over bleached flour and hydrogenated oils any day!

My family look forward to enjoying their hot cross buns straight from the oven at Easter time, and I also use this same recipe to make a fruit loaf all year round . . but isn't there just something special about eating them in the form of a bun :) The enjoyment we all get out of sharing them over brunch or lunch (depending on how late in the day I started making them), definitely makes it worth the extra effort to fuss over their presentation at least once per year. I like to make a double batch of the dough, one batch after another and combine the dough in a bowl to prove. I must confess that I haven't tried the EDC recipe, even though I have heard great things about it, but that's just because I can't quite get past my own recipe . . . when you're onto a good thing you stick to it right? :)


ingredients
330g filtered water
2 1/2 tsp dry yeast
500g spelt bakers flour (use all white or half wholemeal) - use normal strong bread flour if you can't find spelt bread flour. 
3 rounded tsp cinnamon
2 rounded tsp mixed spice
3 tsp sucanat, coconut sugar or raw caster sugar
1 tsp fine Himalyan or Celtic sea salt
20g cold pressed avocado or macadamia oil
1 1/2 cups dried fruit of choice (sultanas, raisins, currants, dried apricots, apple, blueberries, cranberries etc.)

flour paste
60g white spelt flour
70g filtered water
1 tsp cold pressed macadamia oil or softened coconut oil

glaze
3 tbsp filtered boiling water
2 tbsp sucanat, coconut sugar or raw honey
1/2 tsp mixed spice

method
1. Line a shallow rectangular tray or dish with baking paper. 

2. Add 330g filtered water to the TM bowl and heat 1 minute at 90°C on speed 1.

3. Add remaining ingredients (except the dried fruit), and mix for a few seconds on speed 7
Then, set dial to closed lid position and knead for 2 minutes on interval setting

4. Add your dried fruits of choice and use the spatula to combine using a chopping and mixing action. Transfer the dough onto your thermomat, pressing in any runaway sultanas & currants, and wrap up (or place in a large, lightly floured stainless steel bowl and cover).

5. Place the dough in a warm place for 1.5 - 2 hours or until the dough doubles in size. I like to place in a bowl in a 40°C oven or warmer drawer, covered with a damp tea towel. I've heard another great place is inside your car in the sun . . not that I have this option available to me in Hong Kong!

6. Once the dough has doubled in size, turn out onto a floured benchtop or your thermomat. Divide into 12 pieces of equal size (or 24 if you have doubled the recipe). I'm a little pedantic here I must confess, I use a scale to measure pieces of dough at about 90g each :)  Shape each piece into a smooth ball, then place smooth side up into your prepared tray or dish and brush the buns at this point with a lightly whisked egg or milk (this is optional as I didn't do this for the batch I made in the photo, but it will help your buns to brown a little more).

7. Cover the tray of buns loosely with the damp tea towel or your thermomat, and leave in a warm place (or return to the warm oven) and allow them to expand to just fill the pan (about 15-20 minutes). Next, preheat oven to fan-forced 190°C. 

8. Meanwhile, to make the flour paste for the crosses, place all ingredients in the TM bowl and mix to combine for about 20 seconds on speed 4 (or whisk together in a small bowl). Pour into a small ziplock bag and snip off the very corner with scissors (or use a piping bag fitted with a 5mm plain piping tip) and pipe the paste in one continuous line down the centre of each row of buns and then crossways to form crosses. 


9. Place buns in preheated oven and cook for about 15 minutes until golden brown and they sound hollow when tapped. 

10. To make the glaze, combine ingredients in a small bowl and mix well to dissolve the honey or sugar. Brush the hot cross buns with the glaze while still warm. Serve as is or with butter. They are also lovely with lemon butter. These buns are so moist I often skip using any spreads. Enjoy!

Friday, 15 February 2013

Chicken & vegetable sausage rolls with spelt pastry

I adore this recipe, so much so I am even a little hesitant to let you all know about it :)  But it's a bit late now to be precious about my recipes!!  It does make my day when somebody leaves me a little comment down below, so please don't be shy if you are enjoying something here on my blog. . . . .

I pull out either this recipe, or my pork and beef sausage rolls for birthday parties, and they are always a hit :) I always have sausage rolls on hand in my freezer and regularly serve them up for a quick, easy and nutritious evening meal for my girls who devour them with veggie sticks or their favourite steamed veg on the side :) 

I have made several adjustments to this recipe over the years, my most recent is to add TM made stock paste, which adds a deliciously rich flavour to all of my dishes, plus I love to make my own rough puff pastry rather than use the commercial variety. It is very easy to make in the Thermomix if you haven't tried before, and it just adds something very special to a homemade sausage roll. Please let me know what you think :)


ingredients

Pastry: 
185g white spelt flour
190g wholemeal spelt flour
300g unsalted butter - I buy unsalted to avoid commercial salt then add Himalayan
1.5 tsp Himalayan (or sea salt)
150g filtered water, chilled
3 tsp lemon juice 

Filling:
1 sml sweet potato, peeled & thickly sliced (about 250g)
80g fresh wholegrain homemade bread, broken into pieces 
30g tasty cheese, cut into chunks (optional)
1 large clove garlic
1 sml handful your choice mixed fresh herbs, e.g. parsley, thyme, rosemary, oregano
1 sml or half a large onion, quartered
1 medium carrot, cut into chunks
1 sml zucchini, cut into chunks
600g thigh or breast chicken, skinless, cut into 1-2cm cubes
1/4 tsp each of dried sage, cloves and nutmeg - I like to freshly grind my nutmeg & cloves
good grind black pepper
2 tbsp TM tomato sauce (ketchup)
1 tbsp TM chicken or vegetable stock paste
1 tsp Worcestershire sauce

To finish:
1 large egg + a little water
poppy seeds, to sprinkle

method
1. First follow the EDC rough puff pastry method to make 1.5 x qty batch of spelt rough puff pastry using the proportions of ingredients listed above. Make this ahead, wrap well in plastic wrap and place in the refrigerator until you are ready to use. 

2. Peel and slice sweet potato into 2cm thick rounds and place in the Varoma dish. Add 400g of water to the TM bowl and set the Varoma dish into position. Steam for 15 minutes at Varoma temperature on speed 1. Set aside the sweet potato and rinse and dry the TM bowl.

3. Add fresh bread, tasty cheese (optional), garlic and fresh herbs to the TM bowl and chop on speed 7 for 5 seconds. Decant into a bowl. 

4. Add onion, carrot and zucchini to the TM bowl and chop on speed 5 for 5-10 seconds or until evenly  chopped.

5. Return the breadcrumb cheese and herbs mixture and add the cubed chicken, sweet potato and all remaining ingredients to the TM bowl and chop on speed 6-8 until finely minced and well combined. You will need to use the spatula to assist. Stop mixing to scrape down the bowl once or twice. 

6. Remove the slab of puff pastry from the fridge and slice in half, then in half again so that you have four equal sized pieces. Keep aside one quarter and return the remaining pastry to the fridge to keep cold. Roll out the pastry piece on a floured surface or your TM mat, to a rectangular shape of about 15 x 45cm, and 2mm thickness. 

7. Spoon a quarter of the mixture along the centre of the pastry. Turn one side over the filling and roll, seam side down, brush the edge with a little milk or water to seal. I like to then cut each roll in half and then lift each piece off the TM mat onto a chopping board, so that I can use a serrated knife to carefully cut each roll into 6 equal pieces. This creates a clean cut which doesn't flatten your sausage rolls as you cut which can happen if you use a blunt knife, (or use a butter knife on the mat so you don't slice it up!) 

8. Using a sharp knife, cut diagonal slashes into the tops of your little sausage rolls, glaze with a whisked egg and water wash, then sprinkle with poppy seeds. Repeat with the remaining pastry and filling, making 48 sausage rolls in total.

9. When you're ready to cook the sausage rolls, pre-heat oven to 220°C and bake on prepared oven trays for 15-20 minutes or until the pastry is golden brown. Serve with Thermomix tomato sauce (ketchup). If freezing to reheat later, cook until the pastry is just cooked through or lightly golden, then transfer to a wire cooling rack to cool completely. I like to freeze the sausage rolls in a single layer and when frozen solid, later transfer them to ziplock bags for easy storage. 

You can reheat your chicken & vegetable sausage rolls straight from the freezer. Just preheat your oven to 180°C and cook for 15 minutes or until piping hot. 

variation ideas
  • for a nutritional boost use chia seeds in place of about half of the fresh bread or add some to the puff pastry!
  • I usually mix up my fresh herbs according to what I have on hand. I'm really enjoying growing our own thyme, basil and rosemary quite successfully on our balcony these days . . . I love just thyme in a sausage roll and rosemary goes really well with it too!
  • If you have Quirky Cooking's chicken stock paste on hand, this is the better stock paste choice for any chicken dish in my opinion. Thanks Jo! :)

no thermomix?
Prior to owning a thermomix, I would make this recipe using my food processor. I would buy ready-made puff pastry but no more! All pastries I have made in my thermomix turn out amazing, so I will never look back :)

Find me on Facebook at Mixing it up in HK

Monday, 8 October 2012

Mexican tortilla pies

I decided to have some fun with my first ever batch of TM made spelt tortillas! Thank you Quirky Cooking :) I made them with 200g white and 100g wholemeal spelt flour, but I'll add more water next time as they were probably a little too thick (as you can see in the photo below) . . . . anyway I'm sure I'll get better with practise! I've added a tortilla press to my wish list too :)

To fill my tortilla pie crust, I wanted to make a taco-type filling completely from scratch, i.e. no commercial taco seasoning in sight! I am also liking that I now have a gorgeous healthier alternative to corn taco shells . . . I avoid corn and corn derived ingredients these days due to the controversy surrounding it and other genetically modified crops, (read more here). If you like tacos, you should enjoy these. They are both fun and nutritious for your children, with hidden veg inside :)

The filling for these pies makes heaps, so you'll most likely need two batches of tortillas or a full bag of purchased ones, (but if you are still buying it's time to try TM made!). You can make the homemade tortillas ahead of time. Simply store them in a large ziplock bag or freeze them, if you are making more than one-day ahead. You can also prepare the pie crusts up to a day ahead from your freshly made tortillas. Just follow step 1 & 2 below, and store them in an airtight container. They will remain crisp and ready to use. 

I topped our Mexican tortilla pies with freshly made guacamole and grated cheese, but you could also add fresh tomato salsa and sour cream. 


ingredients
TM made spelt tortillas
3 tsp cumin seeds
3 tsp dried coriander (cilantro) leaves
1 1/2  tsp oregano leaves
3 tsp paprika
1 sml dried red chilli - or use chilli powder to taste
1 medium carrot, cut into chunks
1/2 punnet mushrooms
1/2 green capsicum or zucchini, cut into chunks
500g beef rump steak, trimmed & cut into chunks
1 sml red onion, halved
2 large cloves garlic
30g EVOO
1 x can organic BPA-free crushed tomatoes
2 tbsp tomato paste
1 x can organic BPA-free red kidney beans, drained & rinsed
2 tbsp TM vegetable stock paste
handful fresh chopped coriander (cilantro) leaves

guacamole topping
1-2 ripe avocadoes
freshly squeezed lemon juice, to taste
grated tasty cheese, to taste


method
1. Preheat oven to 180°C fan forced. Grease 6-8 holes, 3/4 cup capacity texas muffin pan with oil. You could also use large ramekins. 

2. Microwave tortillas on HIGH about 10 seconds each or until warm to soften (if needed) and form the pie crust by pressing one into each muffin hole, (you will need to fold in the sides of the tortilla a couple of times to make it fit). Spray or brush with coconut oil and bake for about 8 minutes or until golden & crisp. Cool in the pan for 20 minutes.

3. Meanwhile add all of the dried spices to the TM bowl. Grind for 30 seconds on speed 9 or until finely groundDecant and set aside. This is your additive-free taco seasoning!

4. Add vegetables (except onion) and chop for 5 seconds on speed 5. Decant and set aside in a separate bowl to the spices.  

5. Place red onion and garlic (+ fresh chilli if using) into TM bowl and chop for 6 seconds on speed 7. Add the beef and set dial closed lid and mince by pulsing Turbo button 2-3 times. NOTE: Don't overdo the pulsing, remember that your mince will break up more during cooking. 

6. Add the oil and return the ground spices to the TM bowl and sauté for 4 minutes on 100° C, on reverse + speed 1

7. Return the chopped vegetables and add remaining ingredients, except the fresh coriander to the TM bowl.  Cook for 15-20 minutes at 100°C on reverse + speed 1. Stir through the chopped fresh coriander using the spatula. Pour the mince mixture into a thermosaver and clean the TM bowl ready to make the fresh guacamole . . . or use your second bowl if you have one :)

8. To make a basic guacamole, add avocado flesh and lemon juice to the TM bowl. Season well and mix on speed 5 for 5 seconds or until a desired consistency. 

9. To assemble the tortilla pies . . . spoon the Mexican mince mixture into the tortilla cases. Dollop with guacamole and sprinkle with grated cheese. Enjoy!

variation ideas

  • I have also prepared mini versions of these using smaller tortillas in a muffin tin - a fab finger food or children's party idea!
  • If you have leftovers, you could whip up some spelt bread dough and make bread pockets with the taco mixture as a filling.
  • Enjoy gluten-free by serving up the taco mixture with rice  :)


no Thermomix?
  • grind the spices in a coffee grinder
  • use minced beef & cook on the stove top
  • use 2 stock cubes in place of the TM vegetable stock

The inspiration for my TM Mexican tortilla pies comes from this recipe.

Find me on Facebook at Mixing it up in HK

Sunday, 30 September 2012

Best ever chocolate brownies

I just love a good brownie. I'm a self-confessed chocoholic (like so many out there)! My theory is, that if I'm going down the road of a fat and sugar blowout, it has to be well worth it . . . so it has to be a GOOD brownie or there's just no point putting it past my lips! 

My ideal chocolate brownie is rich and dark with has a crisp, meringue-like exterior, a slight chewiness and a moist, fudgy centre. This is the 'Best ever brownie' . . . my personal opinion of course :)

I have made several variations on this recipe over the years . . . my favourites are triple chocolate chip and orange & pistachio . . . I will get around to adding these in case you are already drooling in anticipation?!

I have to tell you that this is not my usual style of recipe, particularly for this blog . . . the chocolate part is of course right on track . . . but the fat and sugar content!  But hey, what is life without the occasional indulgence! Go on treat yourself . . . . you won't regret it I promise!


ingredients
250g butter, cut into chunks
275g good quality dark chocolate (or use half 70% + half milk chocolate)
400g raw caster sugar or sucanat . . . I know, I know
4 large eggs
180g plain flour (white spelt preferably)
50g raw cacao powder

method
  1. Preheat fan forced oven to 175°C. Line base and two sides of a large rectangular pan (20 x 30cm) with a sheet of baking paper. For best results use a light coloured pan or glass dish. 
  2. Break the chocolate up into pieces and add to the TM bowl. Grate for 5 seconds on speed 8.
  3. Add butter and melt with the chocolate for about 1-2 minutes at 60°C on speed 3 until the chocolate has melted and the mixture is smooth and velvety. 
  4. Add eggs and mix to combine on speed 3 for 5 seconds
  5. Add sugar and mix on speed 5 for 20 seconds, or until well combined. 
  6. Add flour and raw cacao and mix on speed 5-6 for 10 seconds until just combined. Do not over-mix. 
  7. Pour the gloriously gooey mix into the prepared pan and bake for 35-40 minutes until the surface is shiny and cracked and the mixture no longer wobbles when shaken. It may be slightly sticky when tested with a skewer. 
  8. Place the pan onto a wire rack and allow to completely cool before cutting into squares to serve. If you can't wait that long, there's certainly nothing wrong with digging into a warm, gooey brownie :) Enjoy as is, or served with a dusting of icing sugar and/or a dollop of cream or scoop of good quality vanilla ice-cream to cut the richness. Best eaten fresh :)
no thermomix?
  • melt the butter & chocolate in the microwave
  • beat the eggs and sugar in a separate bowl using an electric mixer until light and creamy
  • fold the chocolate mixture into the egg mixture
  • sift the flour and cocoa over the liquid and mix until just combined

For the health nuts . . . I promise that some healthier variations will follow shortly! LOL

Find me on Facebook at Mixing it up in HK

Saturday, 1 September 2012

Spelt English muffins

I've been meaning to try my hand at making English muffins for ages. My family loves them, but I choose to avoid the supermarket variety here in Hong Kong, because they are made from all white flour. . . and I just don't do white! When in Australia, I do enjoy wholegrain English muffins, but I'm not sure I'll bother ever again, as you would expect, they just don't compare to a version made in the thermomix :)

The following recipe is based on this one from The Opies Family Food blog, with a couple of changes. My version uses wholemeal spelt flour and added mixed seeds for better nutrition, plus I have sprinkled the muffins with ground millet instead of cornmeal. You can make your muffins ahead of time, and pop them in a ziplock bag ready to toast for breakfast the next day. Or you can go as far as making up the mixture, allow it to prove overnight, and cook your muffins fresh the next morning. They also freeze very well, just split and pack into a ziplock bag ready to enjoy another day.

Spelt English muffins


ingredients
30g whole millet
240g full-cream milk
50g butter
25g raw caster sugar
2 tsp yeast
240 filtered water
375g white spelt flour (or plain flour)
375g wholemeal spelt flour
1/4 cup mixed seeds/ wholegrains (e.g. chia, flaxseeds, millet, steel cut oats) optional
1 tsp Himalayan salt

method
1. Add millet to the TM bowl and grind for 10-15 seconds on speed 9. Decant into bowl and set aside.

2. Add the milk and butter to the TM bowl and heat for 3-4 minutes at 90°C on speed 1 until the butter is melted. Add the sugar and mix to combine for 5 seconds on speed 3. Decant into a small jug or bowl and allow to cool.

3. Place the water in the TM bowl and heat to 50°C for 1 minute 30 seconds on speed 1. Sprinkle yeast over the water (take care to avoid the blade) and allow to stand for 10 minutes or until frothy.

4. Add the milk and butter mixture to the yeast mixture in the TM bowl together with 375g of the flour. Mix for 15 seconds at speed 6 until smooth with the MC cup in place. Add the salt and the remaining flour. Mix for 10 seconds on speed 4. Set the dial to closed lid and knead for 3 minutes. Leave in the bowl with the lid on, until doubled in size. The dough will expand to fill the TM bowl - it will overflow through the hole in the lid if you leave it too long :)

5. Use your fist to punch down the dough and remove onto a thermomat. Roll out to approximately half an inch thick. Cut rounds with a biscuit cutter or the rim of a glass. Sprinkle a sheet of baking paper (or the thermomat) with the millet meal and set the rounds on this to rise. Dust tops with more millet meal, cover and let rise for 30 minutes.

6. Grease a large non-stick frypan with a little butter and preheat on low.  Cook muffins for 5 minutes with the lid on, then remove the lid and turn over, cook for a further 5 minutes or until cooked through. I have a gas cooktop and used the lowest setting possible. Allow to cool on a cooling rack.

7. To serve: use a sharp knife to score the muffin around it's middle and carefully split open by hand. Toast and top with your favourite spread, such as butter, honey or jam. They are gorgeous with lemon butter. Or serve with your favourite egg breakfast.
toasted muffins waiting to be topped!
I'll be trying my hand at a spiced fruit version next yum! I'll keep you posted :)

For more breakfast ideas see Thermomix does breakfast


Find me on Facebook at Mixing it up in HK

Sunday, 19 August 2012

Healthy citrus & poppyseed muffins

As requested by Miss 8, mummy's homemade version of her coffee shop favourite . . and do they stack up?? Miss 8 says "These are way better mummy . . plus they are healthy!" . . . Ha! Nothing escapes my daughter! 

These yummy wholesome muffins are citrus-y, moist and light and come with considerably less guilt than your average citrus poppyseed muffin . . .being lower in fat and sugar, and higher in dietary fibre.

Apple, orange & lemon poppyseed muffins


As this recipe uses the whole fruit, skin and all . . . I'd recommend you try to use an organic apple, orange and lemon for this recipe if possible, or at least wash the fruit thoroughly with a fruit and vegetable wash. Virtually nothing goes to waste in this recipe! These will be great for the school lunch box. . .

ingredients

1 whole apple (I used Pink Lady)
1 whole medium orange or tangelo
zest of 1 lemon (plus juice for icing)
2 large eggs
30g coconut oil, melted if solid (or use melted butter)
50g natural yoghurt
2 tsp baking powder
1 tsp bicarb
120g white spelt flour
120g wholemeal spelt flour
100g sucanat (rapadura) sugar or raw sugar
1-2 tbsp poppyseeds

method
  1. Preheat oven to 170°C and prepare a 12-hole muffin pan.
  2. Peel the zest from the lemon and add to the TM bowl and grind for 30 seconds on speed 9, decant and set aside.
  3. Core and quarter one apple. Add to the TM bowl and chop for 10 seconds on speed 4Scrape down the sides.
  4. Add 20g water and cook for 8 minutes at 100°C on speed 1. MC lid off.  
  5. Cut a whole orange into quarters. Remove the stem piece and slice down the centre of each wedge to remove the white pith and any obvious pips. Add to the TM bowl and blend on speed 7 for 10 seconds
  6. Return the lemon zest to the TM bowl. Add the eggs, coconut oil and natural yoghurt. Mix on speed 8 for 10 seconds until well combined. 
  7. Add baking powder, bicarb, flours, sucanat and poppyseeds and mix for about 8 seconds on reverse speed 4 until mixture just comes together. Do not over-mix.
  8. Spoon the muffin mixture into prepared muffin holes filling each to the top, and place in preheated oven to bake for about 12-15 minutes or until golden and a skewer comes out clean. Makes 12. 
  9. Juice the zested lemon and make a lemon icing to drizzle over the muffins as pictured (100g icing sugar + 1-2 tbsp lemon juice), or enjoy without to avoid the extra sugar. My girls had fun icing them :-)
 

no thermomix?
  • grate lemon zest using a grater, cook up chopped apple on a stovetop or in the microwave. Use a blender or food processor to blend the orange before combining with the remaining ingredients.

 Find me on Facebook at Mixing it up in HK

Wednesday, 13 June 2012

Healthy-ish cacao cupcakes

June is always a crazy month here in Hong Kong. School breaks up for the year at the end of this month . . . so being a teacher I'm busy writing reports, marking assessments etc. Plus every weekend in June (and most weeknights too) seem to be booked up with something social in an effort to cram things in before everyone takes off for our Summer holidays over July-August. . . .just over two weeks to go yay! What I'm secretly looking forward to is more Thermomix 'play' time, as well as quality family time of course! :)

Last weekend . . the first weekend I have neglected to post a recipe on my blog so far :( . . . both our girls were involved in performing for their end of year dance shows over two days! Lucky for mummy (not) they were in two different shows, so I was busy getting them to their rehearsal (1hr away by bus, ferry & taxi - such is HK life without a car) and then hanging out til they performed hours later two days in a row! . . . So needless to say it was a long weekend and they needed something nutritious (and fun to eat) to help them (& mummy) last the distance. . . that's where my chocolate cupcakes (or muffins) come in!  My girls adore cupcakes, as does any child really, so I thought I'd use this as an excuse to have a play and develop a healthy-ish version of their chocolate favourite! BTW my girls delighted us with their performances as we knew they would, so all the effort was well worth it. I just have to share this photo of Miss 8 with you . . my elegant ballerina performing to Swan Lake :)
I must say that I am no stranger to formulating healthier versions of this chocolate treat! I have cleverly disguised spinach & carrot inside a chocolate cupcake/muffin in the past, but this time I thought I'd not go quite as far and settle for making them something which is healthier than the standard recipe, but not quite as adventurous as earlier versions :)

The 'Baci' inspired healthy 'buttercream' (or nut-buttercream) or frosting . . call it what you like! . . actually started out as my experiment for a raw ice-cream which is reminiscent of a soft-serve in texture. . . velvety and smooth. . I fell in love instantly! Frozen banana is a very common ingredient in raw ice-cream, but blend it with raw cacao and ground hazelnuts and it is divine! I'm not a huge fan of the banana flavour, so the addition of these flavourings effectively camouflages this taste for me :) You have to try it!  Of course, the frosting doesn't travel well, especially sitting around all day in 36 degree heat! So I did save it for the leftover cupcakes we finished off at home.

And here is the recipe . .
Healthy-ish cacao cupcakes
These cupcakes are rich, dark, moist and fluffy and considerably healthier than most conventional chocolate cupcakes or muffins with about half the fat and sugar. The topping is so healthy it doesn't count :) . . . it's made from banana, hazelnuts and antioxidant-loaded raw cacao . . . 


ingredients
2 small apples, peeled & quartered
3 fresh meijool dates
1 tbsp water
1 large egg
50g organic extra virgin macadamia or avocado oil 
70g natural yoghurt
80g coconut milk 
1 tsp vanilla bean paste (or liquid extract)
150g organic white spelt flour
20g organic brown basmati rice flour (mill first in your Thermomix)
50g organic raw cacao powder
2 tsp baking powder
1 tsp bicarb soda
70-80g organic sucanat (rapadura) sugar (+ 1 tsp stevia powder - optional)
optional: add choc chips to the batter

'Baci' inspired choc-hazelnut frosting:
50g hazelnuts
120g frozen banana pieces
4 fresh meijool dates
1 tbsp raw cacao powder
1 tsp vanilla paste

method
  1. Preheat oven to 170°C. Line a 12-hole muffin pan with cupcake liners.
  2. First cook (stew) the apples & dates to make your own apple sauce which works well as a fat replacer, plus the dates add some natural sweetness. Add the apple and dates to the TM bowl. Chop finely on speed 4 for 10 seconds and scrape the sides. Add 1 tbsp water and cook at 100°C for 10 minutes on reverse, speed soft. Allow to cool for 5 minutes.
  3. Add egg, oil, yoghurt, vanilla and coconut milk to the TM bowl. Mix on speed 3 for 10 seconds or until well combined.
  4. Add cacao powder, spelt flour, baking powder, bicarb soda, rice flour and sucanat and mix until just combined on speed 5 (it is important that you do not over-mix).
  5. Spoon the batter evenly into cupcake liners and bake for about 12-14 minutes or until a skewer comes out clean. Allow to cool for a couple of minutes in the pan before transferring to a wire rack. Now wash your TM bowl ready to make the frosting / healthy 'buttercream' !
For the healthy frosting: place the hazelnuts in the TM bowl and grind on speed 9 for 1 minute. Add the frozen banana and dates and chop on speed 4 for 30 seconds. Add the raw cacao and vanilla and blend for 5-10 seconds or until smooth and light on speed 6. 

Spoon the frosting into a disposable piping bag and attach your tip of choice! This frosting keeps well in the fridge for up to 5 days. It is a good idea to store the frosting in the bag and pipe it onto the cupcakes just prior to serving. Enjoy!

variations
  • If you have a sweet tooth, you might like to add stevia or use extra sucanat. Personally, I love the rich, dark chocolate flavour, but your children are likely to prefer a little more sweetness.
  • Add 1/2 cup chocolate chips for a little more fun! Combine on reverse or using the spatula at the last step.
  • You could use coconut oil instead of macadamia oil, but it does tend to give the cupcake a coconut flavour because the recipe also includes coconut milk. If you want to use coconut oil, perhaps swap the coconut milk for another plant-based milk or more yoghurt.

no thermomix?
make recipe as per your usual method for muffins/ cupcakes. . . mix all the dry ingredients first in a large bowl, then in a separate bowl or jug whisk the liquid ingredients together, and then add to the dry ingredients. This is the two-bowl method. Mix only briefly by hand or using an electric mixer until just combined. If you over-mix your cupcakes/ muffins they will be tough and heavy. Of course, you will have to stew up the apples and dates in a saucepan or in the microwave and blend to a puree first. 

 Find me on Facebook at Mixing it up in HK


Tuesday, 15 May 2012

We love 100's & 1000's!

As a child I loved 100's and 1000's, and even though I make it my mission to fuel my little girls with nutrients rather than artificial chemicals, you've got to let your kids have some fun right?! So what better way to compromise than by giving them a wholesome cookie topped with a little of what they adore! Mummy's homemade goodies need to have an element of fun after all or they won't be back for more!


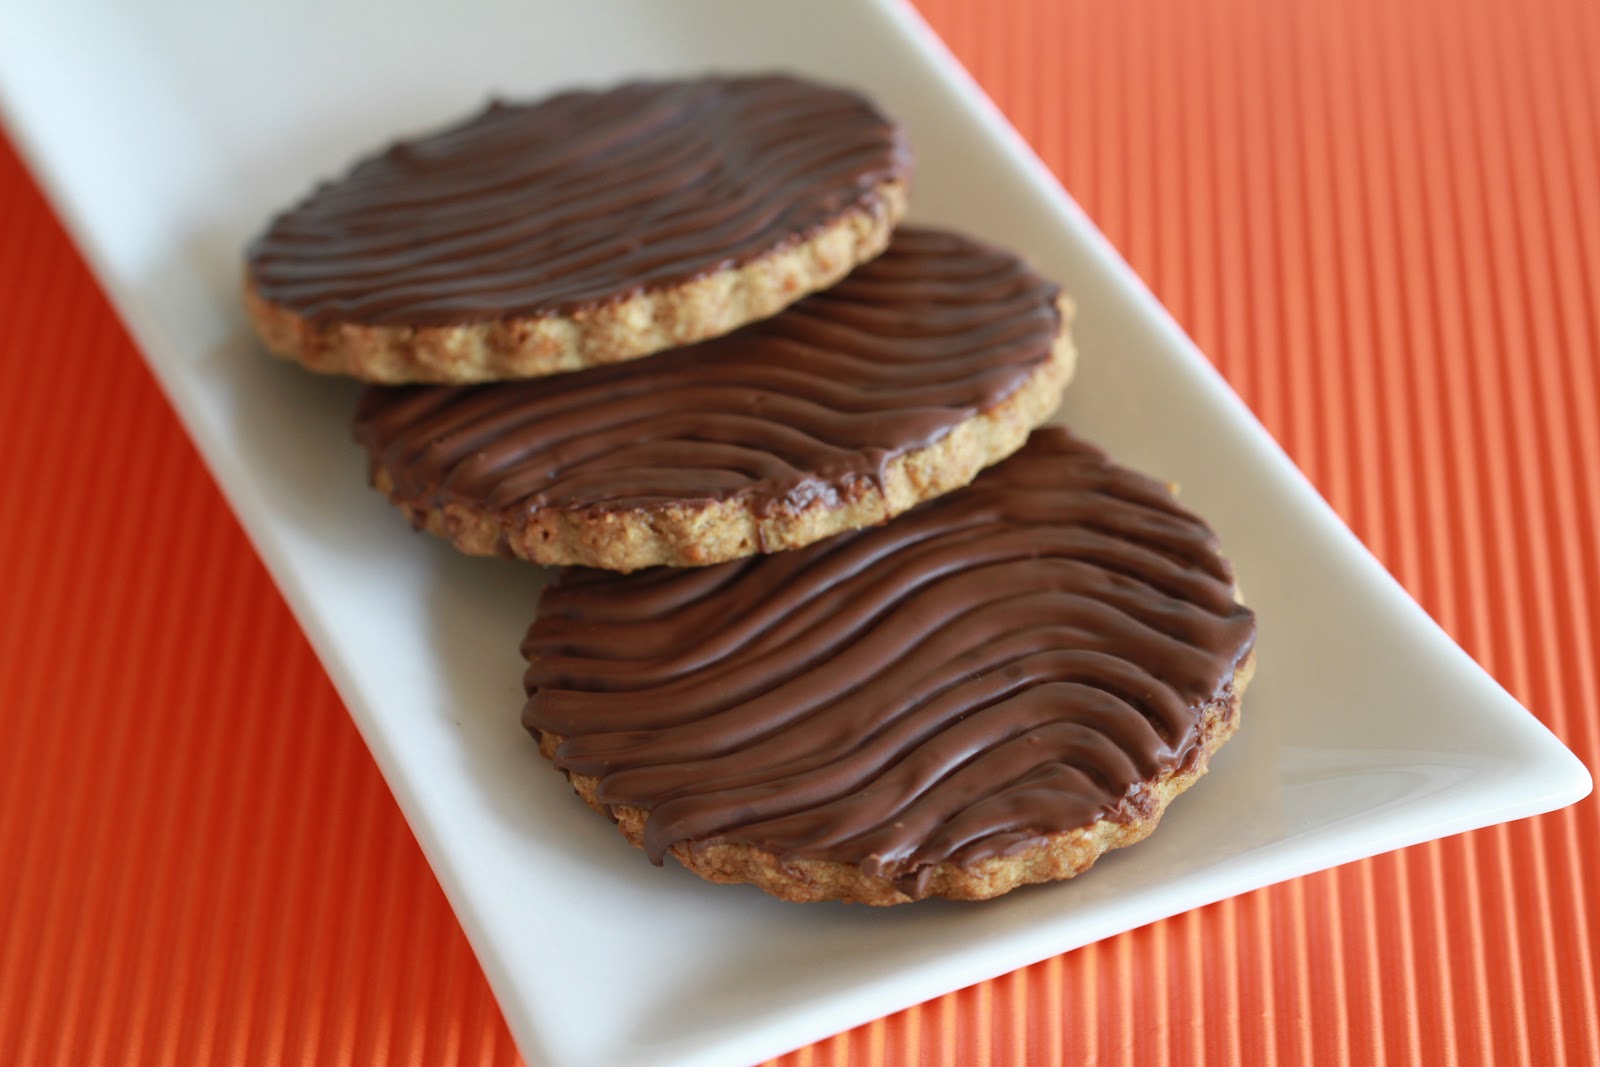
These biscuits remind me a little of chocolate digestive biscuits . . . that wholegrain crunchy texture with a layer of chocolate. Of course, it's much lovelier to bake your own additive-free version with 'real' chocolate rather than compound chocolate. These are perfect for the school lunchbox. They are nutritious, pretty and fun all wrapped into one biscuit! You could even serve them up at a children's birthday party.


Chocolate spelt and oat biscuits

100's & 1000's fun for the children . . .

. . . or simple & lovely with a cuppa!

ingredients

110g sucanat (rapadura) sugar
110g organic wholegrain oats
90g butter (or coconut oil), cut into chunks
1 large egg
20g desiccated coconut
110g wholemeal spelt flour
185g good quality dark (semi-sweet) chocolate, melted


method

  1. Grind sucanat sugar for 3 seconds on speed 9. Decant into a small bowl. 
  2. Add whole oats to the TM bowl and grind for 10 seconds on speed 9. Decant into a separate bowl to the sugar.
  3. If using butter straight from the fridge, add to the TM bowl and soften for 40 seconds at 50°C on speed 4. Scrape down the sides of the bowl. Coconut oil will not require softening. 
  4. Add ground sucanat and beat for 1 minute until smooth on speed 4, scrape down the sides of the bowl.
  5. Add the egg and beat for a further 10 seconds, scrape the sides.
  6. Return the ground oats to the TM bowl with the coconut and wholemeal spelt flour. Combine on reverse speed 4 for about 10 seconds until the mixture comes together. Don't worry if it is a little sticky. Remove biscuit dough and press together into a ball. 
  7. Roll dough between two sheets of baking paper until 5-6mm thick. Carefully place on a tray in the fridge for 30 minutes.
  8. Preheat oven to 180°C and prepare two oven trays with baking paper or silicon sheets.
  9. Cut 7cm rounds or fluted rounds from the dough and place them about 2cm apart on trays. Press the scraps together and roll out again to make a total of 18-20 biscuits.
  10. Bake for 10-12 minutes or until golden. Allow to cool for about 5 minutes on trays before removing to a cooling rack.
  11. Spread bases of biscuits with melted chocolate. Make a pattern with a fork if you like or sprinkle with 100's and 1000's. Stand at room temperature until set. Store in an airtight container, in the refrigerator if the weather is hot. 


no thermomix?
Grind your oats in a food processor or use a 50/50 mixture of porridge oats and oat flour. Cream the butter and sugar using an electric mixer, add your egg, mix again, then add your dry ingredients and mix until the dough comes together. 


variation
  • use brown rice flour in place of the wholemeal spelt to make these wheat-free
  • use coconut oil and dairy-free chocolate and make these dairy-free!
  • spread with white chocolate instead of dark
  • ice with royal icing instead of chocolate & decorate as you please :)
  • try adding some cinnamon, plus dried fruit such as cranberries or currants at step 6 . . I might try this next time!


May 22, 2012 
Today I tried the cinnamon (1 tsp) + dried cranberries (60-70g) variation idea . . .

. . . and topped with white chocolate they are even more devine!


I chopped the dried cranberries using Turbo before I ground the sugar (step 1). Whatever you do, don't try the biscuit dough or you'll have a hard time stopping at one taste! I lurve this variation! 


 Find me on Facebook at Mixing it up in HK